Last year has passed and it went very fast, especially the last month. So much to do at work and home to prepare for Christmas. I didn’t even decorate my home this year. I did however make a lot of Christmas cards, mostly for selling at work where we had some sort of market/shop with stuff I and three other people make and or sell. I don’t think anyone of us sold as much as we hoped for. I did however sell two cards, one bracelet, eight angels and got 4 orders. Not too bad if I may say so myself!
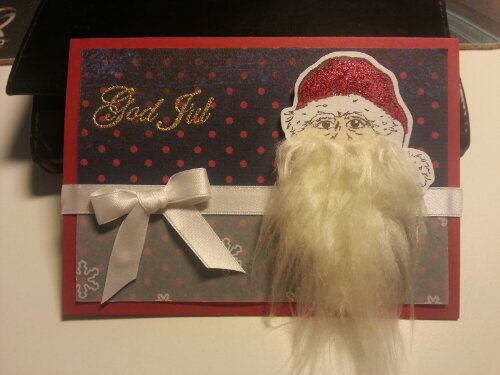
Here are the cards I made and sent to my friends and family. My goal was to use up a few papers from a Christmas long, long ago. Barely made it!


My new favourite technique: coloring the card and stamping in the lighter middle, coloring parts of the stamp with promarkers and or stickles. Just love this stamp!


The Christmas presents all wrapped up and ready for Christmas eve!

All the ingredients for my Christmas candy this year, didn’t use all of it but quite much!

Chocolate dipped marshmallows with sprinkles and sort of Mozartkugeln


Mozartkugeln wrapped in stashed aluminum sheets and a few without, rocky road and my favourite: nougat and marzipan bars covered with chocolate and cut into slices. So easy to make and so damn delicious!

Most of the candy I made was wrapped up and sorted in cellophane bags as giveaways for my family. Another use for my old stashed paper and stickers! The labels which I stapled on the bags. They were very appreciated!


A very special Christmas gift for my oldest brother, I used one of my caldendar presents to color the tag, stamped the text and tied it to a bunch of papers.

My awesome Christmas calendar! I want one next year too!

The stuff I got from the calendar:
Washi tape
Fabric tape
Embossing powder
Stickles
Distress ink
Different type of decorations
Brads
Stamps
Paper pads
Nail polish


 Last Friday I started a new project, a present for my cousin who is moving to her first own apartment next week. She wished for a bucket with cleaning stuff. I wasn’t sure about how much she knew about cleaning or about using soft soap and since I was in the mood for crafting I decided to make her a small cleaning guide. Printed plain papers are no fun to look at or learn from, although the stain removal guide was so long and useful I just printed it out so she can tape it on the inside of the cleaning closet door. I was pondering about whether to make cards with tips and instructions and or collect them in an album or book. I had a few ring albums lying around but none seemed to fit for this purpose, so I got the idea of binding a book myself!


