I finally had the time to draw the instructions for how to make the scarf, I’m not very artistic but I hope you can understand it anyway.
First of all you will need to get these items before starting:
- Fabric, I used fleece in two different colors but use whatever you like! you will need 7 pieces and one piece is 12×42 cm. So if you have a fabric that is 140 cm wide, you’ll need about 30 cm of it. This scarf is quite big so if you prefer a smaller one or a kid sized, you’ll need even less!
- A 20 cm zipper
- About 2,5 m silk ribbon of your choice, I recommend to use a ribbon wider than 1 cm.
- A sewing machine (or a lot of time)
- Thread
- Scissors
- Pins
First step: Cut out 7 pieces of the fabric. Each piece at 12 x 42 cm and measured for 1 cm seam allowance.
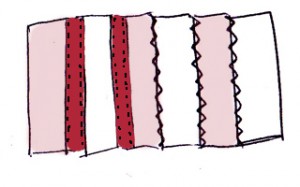
Pin the pieces together with the right sides facing each other, start with one pair and add the pieces one by one. Sew them together with a straight seam.
Since I didn’t have my iron with me, Malin suggested that I sew a wide zig-zag seam over the seams to press them down. Very clever idea!
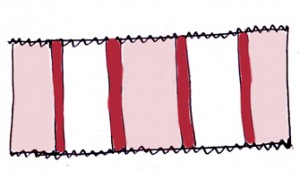
When you’re done it’s time to attach the ribbons. I measured and cut them on the scarf but they should be about 42 cm long.
Pin and sew the ribbon from the right sides, hide the seams with the ribbons and use a thread in the same color as the ribbon. I sewed quite close to the ribbon edges, as close as possible will give a better result!
When the ribbon is in place I sew a zig-zag seam over the edges to avoid the ribbon from unravel. If you use a fabric that might unravel you will have to do this on all sides.
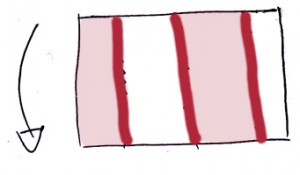
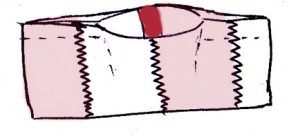
Fold the scarf with the right side facing itself and the zig-zag edges touching. Make sure you see the back side before sewing along the edges and leave a few centimeters open in the middle so you can turn it inside out later on.
The scarf should now look something like this.
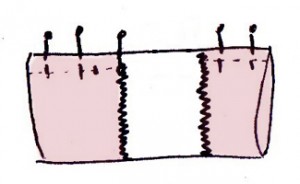
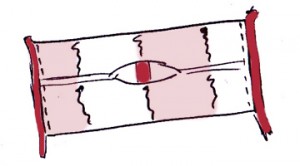
And now it’s time for the tricky part. Fold the scarf so the seam is in the middle of it and attach the zipper, one part on each side of the scarf. Make sure it’s turned right and that the zipper is on the inside from here, also make sure the seam-side will become the inside. Pin and sew the zipper, try to get the seam close to the zipper using the appropriate presser foot.
Before sewing you can turn it inside out to check it looks good and seems to be correct, just be careful with the pins.
When you’re done it’s time to turn it inside out and make sure you can use the zipper. If you have to change something just do it now. If not then close the hole on the inside either using your sewing machine or by hand. It will look better if you do it by hand but it works just as good with the machine. Just make sure to leave the outer fabric alone so there will be no seam visible from the outside.
And now you’re all set!


Great idea. Well explained!
hi, i was just wondering what colors should i use for this scarf? i mean i know its pink white and red, but should i use a certin shade?? i want it to be as right as possible
thank u so very much
Hi Laura!
I just took whatever the store had to offer. I don’t have any certain shades or so, just watch a few episodes or pictures on google and pick whatever you think are the best shades :) I think the pink I used was quite baby pink-ish and the red stripes were slightly colored like red wine. You can see the image of the result here: http://media.tanttherese.se/2010/10/PICT7985.jpg
Good luck!